If you want to print artwork in full colour and with a high-quality finish, there are several things you have to consider. Now, you don’t need to learn about every single printing definition or technology to create good artwork, but there’s a process you should follow.
If you’re wondering how to prepare artwork for printing, explore our tips below.
- The Simple Steps to Prepare Print-Ready Artwork
- Choose a File Format
- Decide on a Colour Model
- Get to Grips With Image Resolution
- The Essentials for Printing: Bleeds and Trim Boxes
1. The Simple Steps to Create Print-Ready Artwork
This section is for those who know the printing process and different methods pretty well already and just need a quick reminder on the steps. But if you do need more detailed information, skip to the next section.
We recommend going over these specifications with your print provider early on so that there are no future issues.
- Choose a file format. PDF usually works best.
- Add a bleed area. Most printing requires a 2mm to 4mm bleed area. This is only required for bleed-to-edge artwork - you can specify this with your print provider.
- Embed all fonts or convert to vector paths.
- Save your artwork as a single-layered image using a CMYK colour model.
Simple, right? And now for a little more detail - if you need it.
2. Choose a File Format
The first thing to consider when preparing artwork for print is which file format to save it as. This depends on the software you’re using. We recommend using image publishing software and/or vector drawing software such as Adobe Illustrator or InDesign.
Essentially, you need software that allows you to export images to either the CMYK or RGB colour model. Don’t worry, we’ll get to these later.
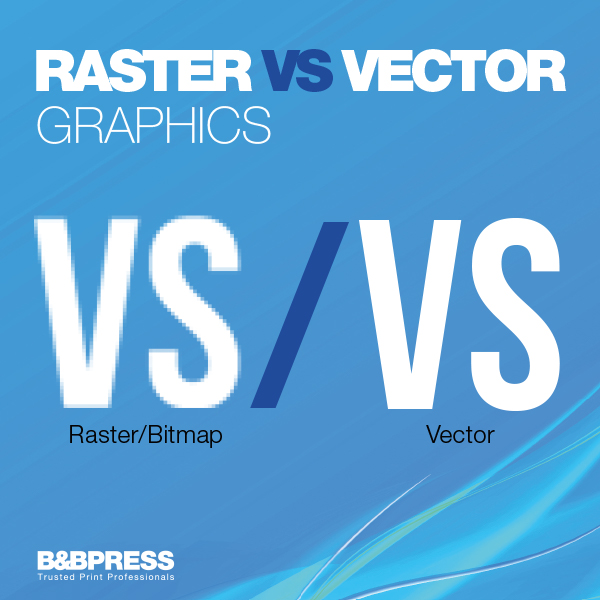
While it’s possible to use image editing software such as Photoshop to export your final image, we wouldn’t recommend it. These programs create raster images as a bitmap, whereas you want an image created as a vector model.
Vector models use geometric shapes rather than pixels to generate an image. This means the image will retain its clarity, especially when blown up to larger sizes.
If you do use Photoshop, import the finished image into a vector-capable program such as Adobe Illustrator or InDesign. Remember, vectors don’t work for everything.
Here’s a table recommending what you should use vectors and rasters for.
|
Vector |
Raster |
|
Logos |
Photos |
|
Illustrations |
Paintings |
|
Text |
Textures |
3. Decide On a Colour Model
This is pretty simple. Whenever you save artwork, you can choose between the CMYK or RGB colour model.
Although image publishing software gives you the choice, it’s actually implying that the image is intended for two types of use - printing or digital publication.
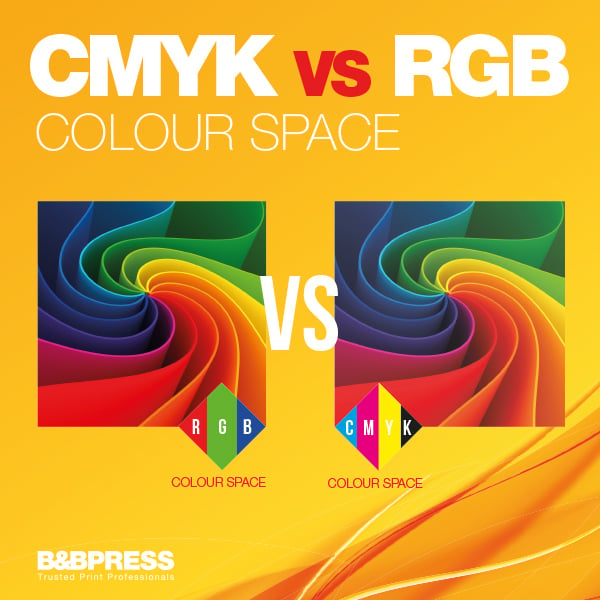
The printing process uses CMYK (cyan, magenta, yellow and black). CMYK is a subtractive colour model. This is because it adds pigment or dye to a page to subtract white from an image.
Remember, when you look at a colour on a screen, it’s not accurately represented as the hue it will be when printed. You’re actually seeing a mixture of the primary colours created by light. Printed colours are different in that you’re seeing reflected light subtracting what is absorbed by the print.
When you prepare artwork for printing, always use CMYK. This means you’ll get the best model for your print designs, ensuring it produces the correct colours. Correct colouration is key, especially when designing things such as marketing materials or luxury bespoke printed items.
4. Get to Grips With Image Resolution
This is probably the most important part of how to prepare artwork for printing.
First of all, if your image is solely comprised of vector graphics then resolution isn’t an issue. You can scale an image created purely as a vector file to any size without loss of resolution. However, most images will still contain at least some raster elements.
A Small Guide to Image Resolution
Resolution is measured in DPI (Dots Per Inch). DPI is the number of dots, or pixels, that would fit into an inch if the image was printed unscaled. ‘Number of dots’ is a little vague, so think of DPI as pixel density.
A 100DPI image would have a pixel density of 10,000 pixels. A 300DPI image has a pixel density of 90,000 pixels, which means it has a much higher resolution. Realistically, you want a higher DPI for your image.
When preparing artwork for print, we recommend having at least 300DPI for your image. This means the naked eye won’t be able to see the individual pixels at a close distance. It’s considered photographic quality.
However, if you’re printing for larger format pieces, 150DPI should be just fine as these artworks are more likely to be viewed from a distance.
5. The Essentials for Printing: Bleeds and Trim Boxes
Adding a Bleed
Adding a bleed is essential for any method of printing, whether you’re using LED UV, Lithography or another process.
A bleed is the area of the image that's extended beyond the final trimmed product. It’s pretty much just a way to reduce misprints and provide a margin for error.
In the printing process, cutting machines will trim the printed image to your specifications. If you haven’t left a bleed, the cutting machines will trim 0.5mm past the edge of your graphic. If you haven’t extended the image beyond a bleed area, this cutting will leave a noticeable white line and look unprofessional.
We recommend a bleed area of 3mm. Add this amount to each side of your image.
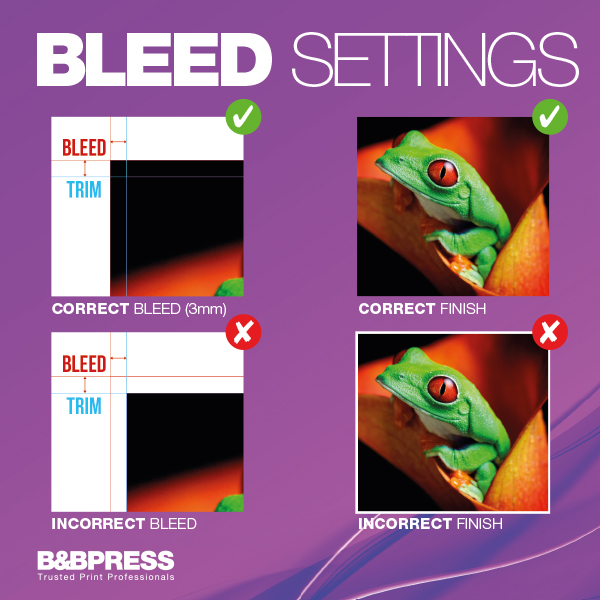
Trim Boxes
The trim box will tell the printers where your artwork needs to be cut to. This will be smaller than the bleed area and the same size as the final print measurements. It’s wise to have all important visuals or information within a safe area, roughly 4mm smaller than the trim box on each side.
There are quite a few things you need to decide upon when choosing the printing process, so you’ll need a helpful resource to talk you through each step.
Want to Prepare Your Artwork for Printing With Insights From Experts in the Industry?
With deadlines looming and the clock ticking before you launch your online campaign, we could understand if making sure your file is a PDF is the least of your worries.
Here at B&B Press, we’re always trying to make it easier for our customers. That’s why we’ve created a brilliant print guide to advise and inspire you through each stage of creating your print.
For more tips on preparing artwork for print, you can contact an expert printing professional like B&B Press or download our ‘Guide to Creating Brilliant Print’ below.